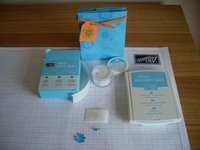
My hostesses are very special, they invite me to their homes, to meet with their friends and family to have a fun filled afternoon or evening of papercrafting and to find out all about the wonderful things they can create with Stampin’ Up! products.
Before each home workshop I spend time talking to the hostess about the things she is interested in and what fun projects we can create together. I had a wonderful home workshop hosted by Vicky who is a very talented card maker, She loves to give personalised gifts to go with her wonderful cards so I thought this little bag would be great for her and she loved it.
You need
- 1 x A4 Card stock I used Tempting Turquoise
- Seeing Spots Stamp set
- Small piece of Tempting Turquoise and Pumpkin pie cardstock
- Tempting Turquoise ink
- Pumpkin Pie Ribbon
- Mini Glue dots
- 1 brad
- Scissors
- Cropodile
- Tag punch

On one side of the card stock stamp random images all over using the Tempting Turquoise ink and the Seeing Spots stamps, make sure some of the images go over the edges of the card as this gives a more professional finish.
Turn the card over and score at 6cm in from each of the long sides.

Then score at 12cm in from each of the short sides

Now the slightly tricky bit…you need to measure 6cm the point where the lines cross over along the long side, you are going to make a diagonal score line to the outer edge. Please use the photo to guide you. As you do more you won’t need to measure!

Now fold in thelong sides to the centre and on one side only punch 2 holes about 2 cm apart through the layers of card stock. You will also need to crease the diagonal folds you made at the last set so they sit as shown in the photo. The sides of the bag will also need to fold in a little it looks like a ‘W’ shape in the photo.

Now fold in the other side ( the one without any holes).

Stamp the thank you and flower onto some Pumpkin Pie card stock and punch out a tag shape. Stamp the flower a second time onto Tempting Turquoise cardstock and cut it out. Using a Tempting Turquoise brad I covered it in a mini glue dot , this was something Shelli demonstrated at the Open night in London and is a really neat trick! The mini glue dot is a perfect size and you just rub it over the brad so it shapes to the sides of the brad then you dip it in Dazzling Diamonds a fantastic fine glitter. The great thing about using a coloured brad is the glitter allows the colour to shine through. I then attached the cut out flower to the tag with the glittered brad.
You need to thread the ribbon through the holes from the inside of the bag, then turn the bag so the holes are at the back and bring the ribbon around to the front. Thread on the tag and fasten the ribbon, trim the ribbon to size, all finished.

This bag was inspired by the one sheet box tutorial on Splitcoast Stampers Forum, I have adapted the sizing to fit UK paper sizes, and tweaked and added my special touch.


